Thinking about creating your own website or blog? It might seem like a daunting task, but with the right guidance, anyone can do it! Whether it's for a personal project, a small business, or sharing your passion, this step-by-step guide will walk you through the essential process of starting your very first website in 2025.
Step 1: Define Your Website's Purpose and Niche
Before diving in, ask yourself: What is this website for? Who is my target audience? Clearly defining your goals (e.g., sharing information, selling products, building a portfolio) and your niche (the specific topic or area you'll focus on) will guide all your future decisions, from design to content.
Step 2: Choose Your Website Platform
This is the software you'll use to build and manage your site. Popular options include:
- WordPress.org (Self-Hosted): The most popular choice, offering incredible flexibility with themes and plugins. It requires purchasing hosting separately but gives you full control. **Highly recommended for most beginners.**
- Website Builders:** Platforms like Wix, Squarespace, or Hostinger's own Website Builder offer drag-and-drop interfaces but can be less flexible or more costly in the long run.
Other CMS:** Joomla and Drupal are powerful alternatives to WordPress but generally have a steeper learning curve.
For this guide, we'll focus primarily on the steps assuming you choose a self-hosted platform like WordPress, which requires separate hosting.
Step 3: Choose and Register a Domain Name
Your domain name is your website's unique address on the internet (e.g., `startwithsite.com`).
- Keep it Simple & Relevant:** Choose a name that's easy to remember, spell, and relates to your website's topic.
Use Common Extensions:** .com is the most popular, but .net, .org, or country-specific extensions (.co.th) can also work.Check Availability:** Use a domain registrar (like GoDaddy, Namecheap) or your hosting provider to see if your desired name is available.Register It:** Purchase the domain name. **Pro Tip:** Many hosting plans, like those from Hostinger, offer a free domain name for the first year!
Step 4: Select Your Web Hosting Provider
Web hosting is where your website's files live online. Choosing a reliable provider is crucial for speed, security, and uptime.
For beginners, **Shared Hosting** is usually the most cost-effective and easiest option to manage. It means your site shares server resources with other sites, which is perfectly fine for new websites with moderate traffic.
Recommended Hosting for Beginners: Hostinger
If you're looking for a provider that balances affordability, ease of use, and great performance (especially for WordPress), we highly recommend Hostinger.
User-Friendly hPanel:** Easy to navigate, even if you're new to hosting.Good Speed:** Uses modern tech like LiteSpeed servers.Free Domain & SSL:** Included in many annual plans.
- Very Affordable:** Perfect for tight budgets.
Getting started is quick and simple. Use the link below to see their latest offers!
When choosing any host, consider factors like price (including renewal rates!), customer support, uptime guarantee, and features included (SSL, email, backups).
(Optional Link: Learn more about different hosting types)
Step 5: Install Your Chosen Platform (e.g., WordPress)
[cite_start]
Most hosting providers, including Hostinger, offer a **"one-click" installer** for popular platforms like WordPress via their control panel [cite: 1090-1118]. This is the easiest method:
- Log in to your hosting control panel (like hPanel).
- Find the "Website" or "Auto Installer" section.
- Select "WordPress" (or your chosen CMS).
- Fill in the details (domain, site title, admin username/password).
- Click "Install".
Alternatively, you can install manually by downloading the files, uploading via FTP, and creating a database, but the auto-installer is much simpler for beginners.
Step 6: Choose a Theme and Customize
Your theme controls the visual appearance of your website. WordPress offers thousands of free and premium themes.
- Go to "Appearance" -> "Themes" in your WordPress dashboard.
- Browse, preview, and install a theme you like.
- Use the "Customize" option to adjust colors, fonts, layouts, upload your logo, etc.
Step 7: Add Essential Pages and Content
Start by creating fundamental pages:
- Homepage:** Your site's front door.
About Page:** Tell visitors who you are.Contact Page:** Provide ways for people to reach you (use a contact form plugin).
Then, start creating your main content (blog posts, product pages, portfolio items, etc.). Remember to focus on quality and what your audience wants to see!
Step 8: Configure Basic Settings & Launch
Before announcing your site to the world:
- Permalinks:** In WordPress, go to Settings -> Permalinks and choose "Post name". This is better for SEO.
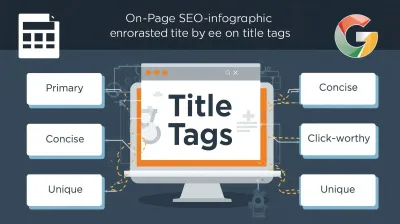
Site Title & Tagline:** Double-check these in Settings -> General.Install Essential Plugins:** Consider plugins for SEO (like Rank Math or Yoast SEO), Security, Backups, and Contact Forms.
Once you're happy with the basics, it's time to launch and start promoting your new website!
Starting your first website involves several steps, but breaking them down makes the process manageable. Choosing the right platform and reliable hosting like Hostinger sets a strong foundation. Don't be afraid to experiment, learn, and start sharing your unique voice online!